


Spring Sale - 5% OFF orders £50+ -

Verified
Verified
Verified
Verified
Verified
Verified
Verified
Verified
Verified
Verified
Verified
Verified
Verified
Verified
Verified
Verified
Verified
Verified
Verified
Verified
Read our guide on how to install your wall panelling.
Our custom height dado and beading panelling allow you to create a very traditional Wainscoting Panelling technique which dates back centuries.
Our classic wainscoting dado and beading panelling are typical of the Georgian era. This type of decorative panelling is the perfect feature to add character to any space and is particularly popular in hallways and living rooms.
By panelling just the lower half of your walls, you can leave room for shelving, lighting or painting on your upper walls. Accentuating a wall with this kit can help define a room by lifting it with elegance and texture whilst aiding any interior design themes or styles. There are plenty of personalisation possibilities to add flair to the home with multiple designs and colours.
Our Wainscot Beaded Panelling is the most versatile available in the UK, offering unmatched convenience and quality. Unlike other companies, we cut and mitre all the beading for you, ensuring a perfect fit and eliminating the need for tools or creating any mess.
Simply measure your wall, and our pre-cut mouldings are ready to stick directly to the wall, making the installation process effortless.
Our exclusive visualizer tool allows you to see exactly how your panelling will look before you purchase, helping you decide on the perfect number of columns to suit your space.
Opt for Wainscot Beaded Panelling from Cut My for an easy, precise, and elegant wall transformation.
The beading is slightly smaller than the dado rail. When placed vertically on the wall, its height is 35mm and its width comes out to 15mm.
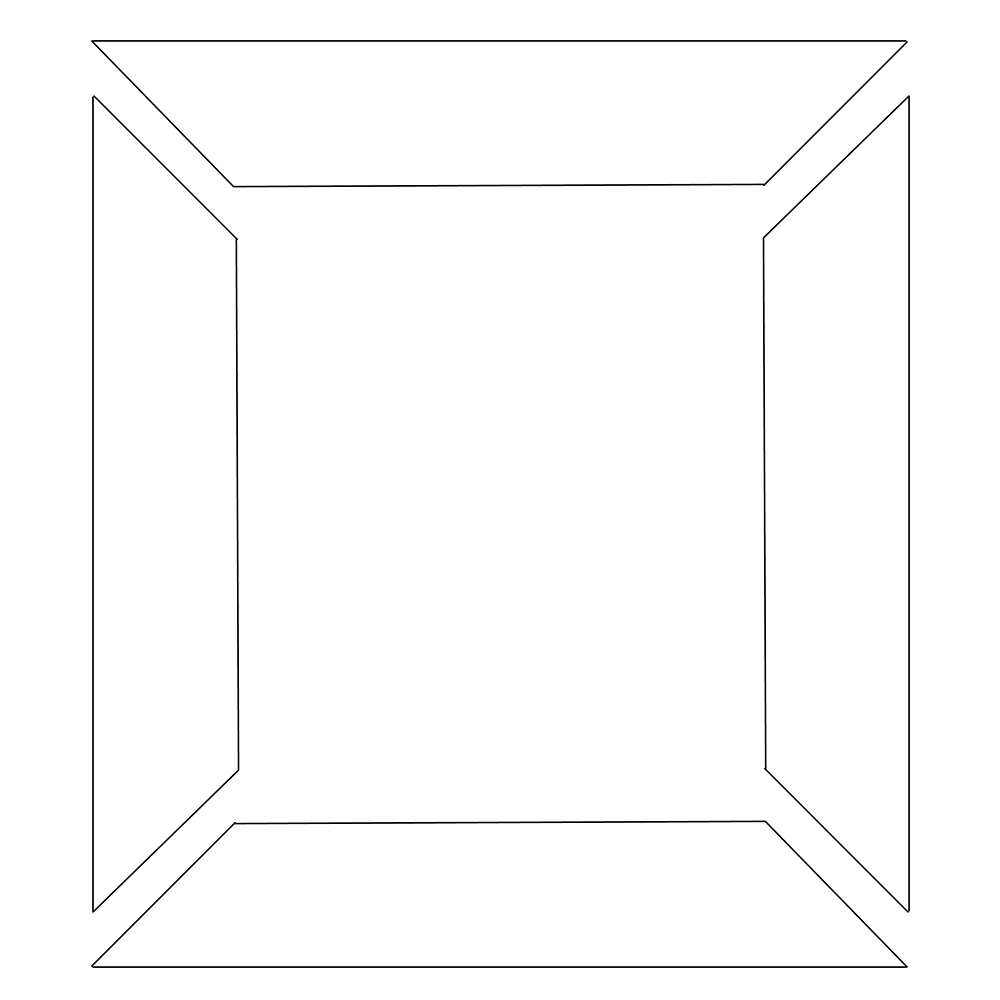
We mitre your beading for you, so you will receive your beading already cut at 45-degree angles on the ends so that you can fit them seamlessly together on the wall.
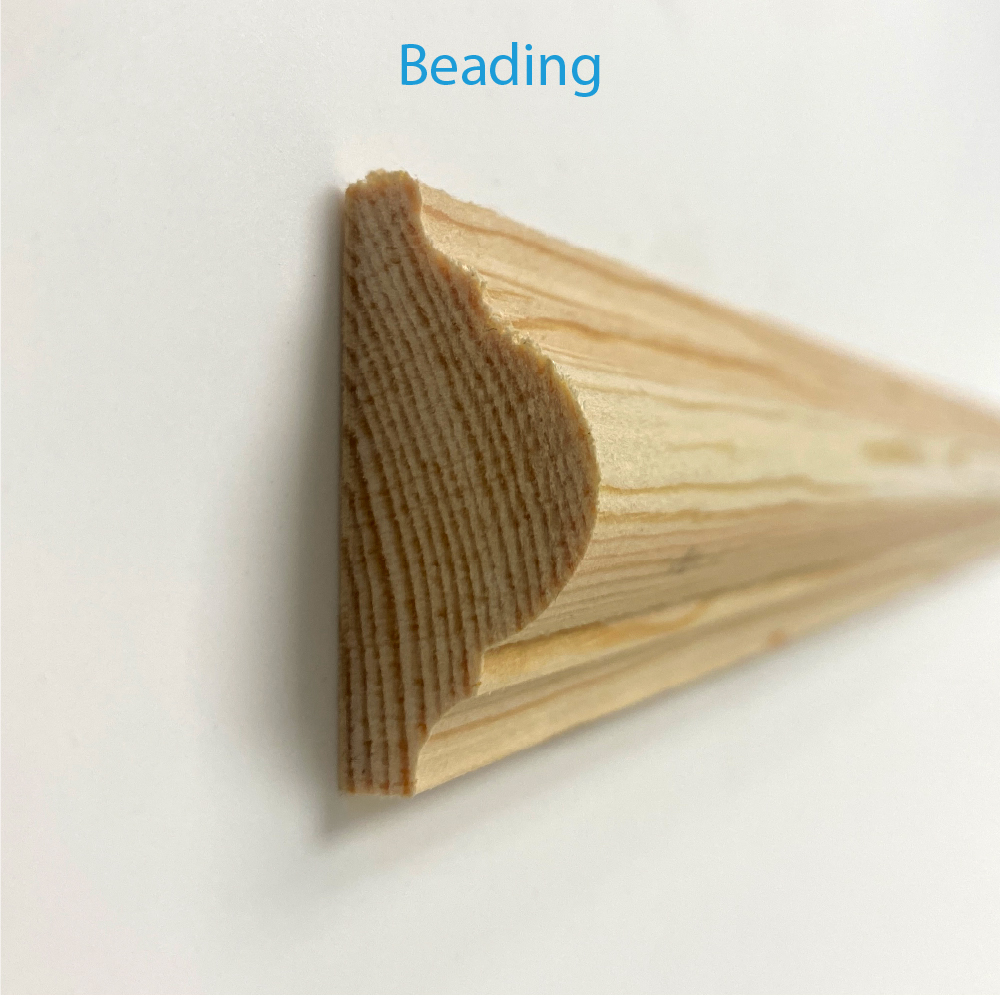
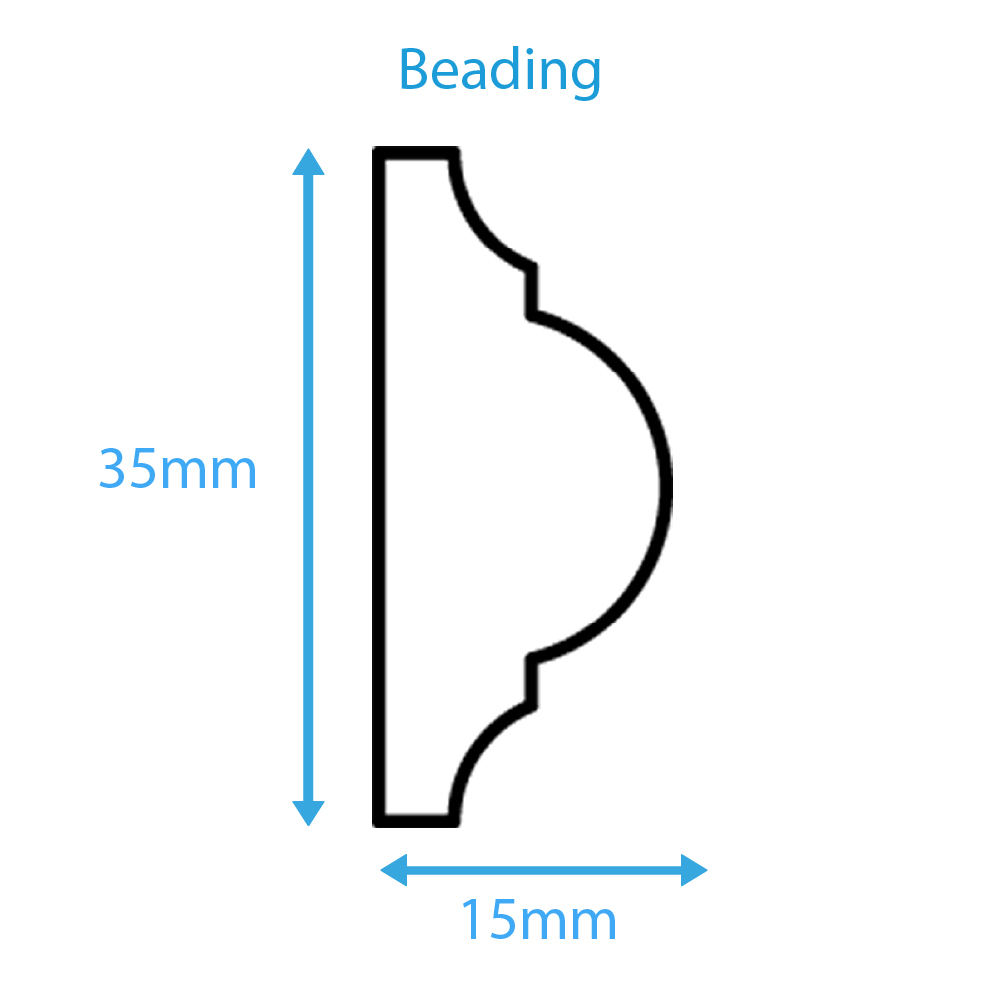
Adding a dado rail is an excellent way to guard your walls, traditionally a dado rail was used to prevent damage to the walls where it is likely to get dented or scuffed by furniture knocking into it.
Our solid pine dado has a traditional profile extending out 21mm and standing at 44mm high.
Popular in hallways placed at one-third of the wall height, the dado rail can accentuate the length of your hallway making it seem much longer than it is. Placing two-thirds of the wall directly behind the headboard, the dado draws attention to the bed while enhancing the contrast of soft furnishings and textures.
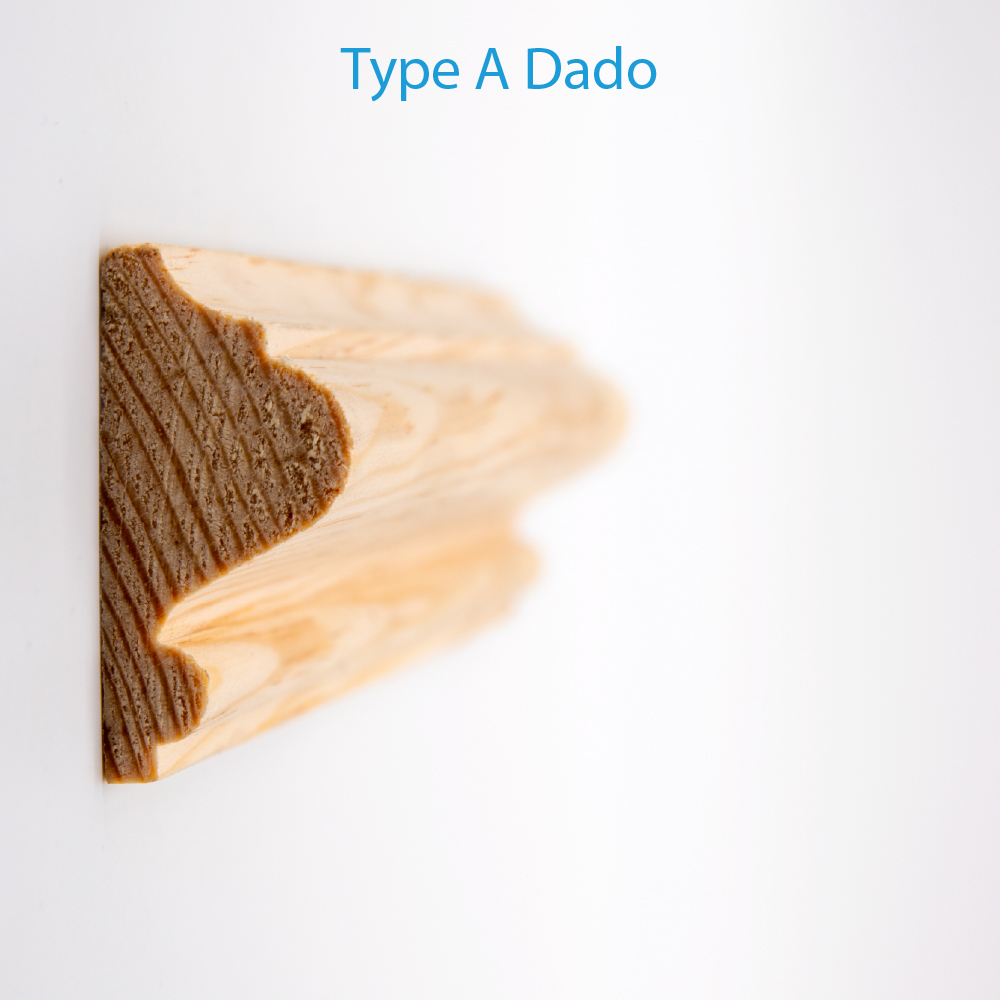
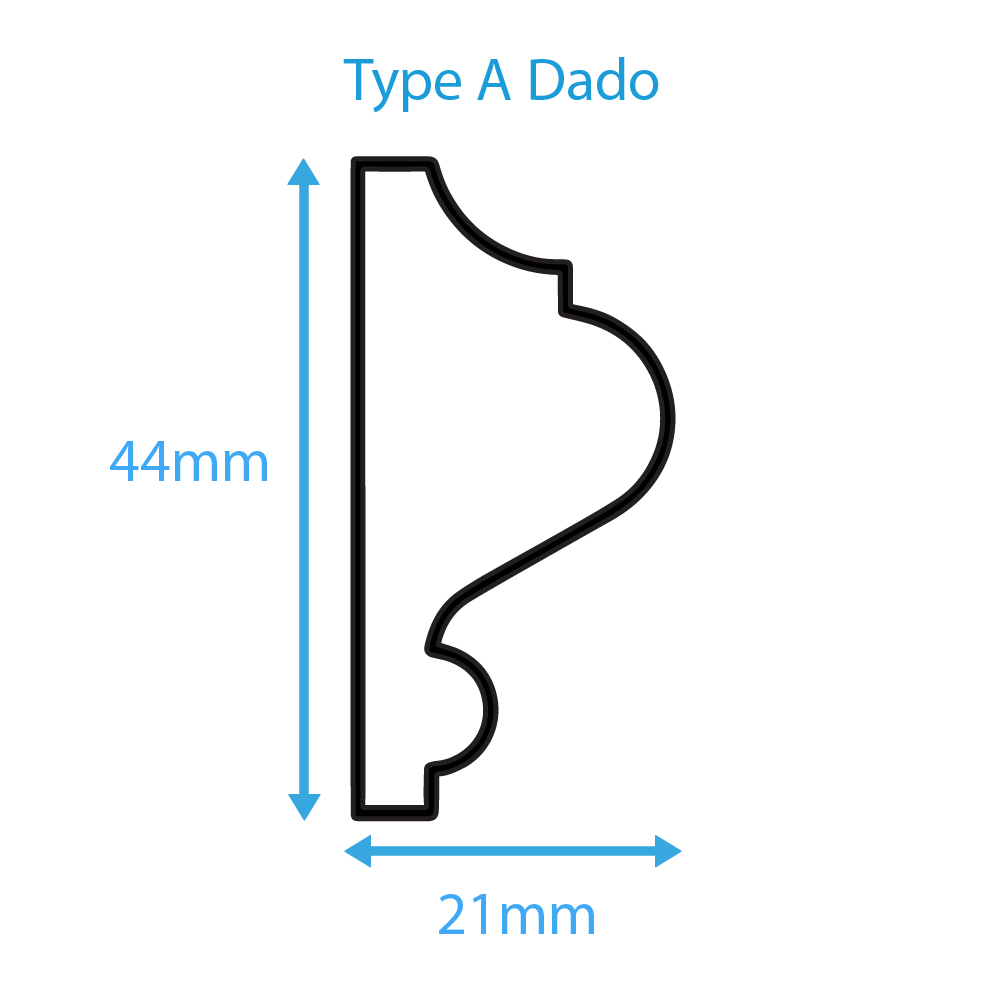
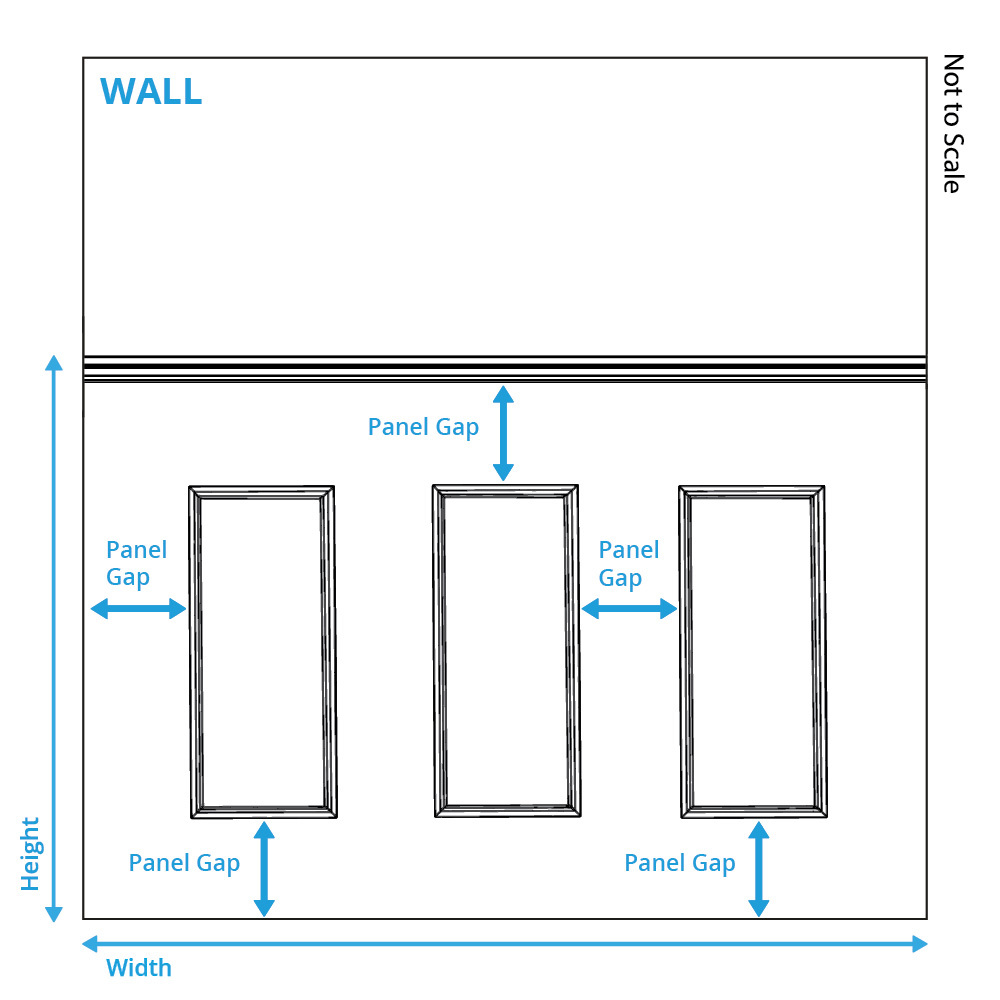
A good way to decide where you would like to fit your custom height panelling is to consider what furniture and home decor are already in the room, and where your panelling would look best around it.
Buying your wall panelling couldn’t be any easier. Simply measure the width of the wall and the height from the skirting to where you would like the top of the dado rail and decide on the number of rows and columns. We’ll calculate everything for you, no need for the headache involved in working out measurements.
You’ll receive a solid timber dado rail and beading to complete the look. Everything will be pre-cut and pre-mitred ready to stick on the wall, so no cutting or wastage at home. They can also be primed and ready to paint, saving you time and effort.
Like with the illustration, you will need to decide on a panel gap measurement which will be the distance between your beading panels and the Dado rail. You can see what this will look like by inputting your dimensions and then checking out the visualiser.
Our maximum dado length is 1500mm. If your wall is longer than this and therefore you enter dimensions larger than 1500mm, we will provide you with multiple pieces to make up the total length required. We will make sure that the panels are cut to equal sizes so that they can be joined in the middle.
After ordering your dado and beading panelling, now comes the important part: Installation.
Traditional Beaded Kit Installation
Don't worry - we also include a physical instruction manual within your kit which can help you with installation.
Below is also a step-by-step guide to assist you in installation.
The technical view of our visualiser (at the top of this page) will show you which measurements you need between each beading strip based on your input. Make sure to note down these measurements when ordering the kit so that you know how far apart you should be marking the measurements when it comes to installing it. Your beading strips have been cut at a 45°angle so they will fit together in a seamless square.
Prepare your space by ensuring the wall you are going to put on your traditional beading is smooth and clean. Lie out your Dado Rail and your Beading strips on the floor or on a tale and group them together by size.
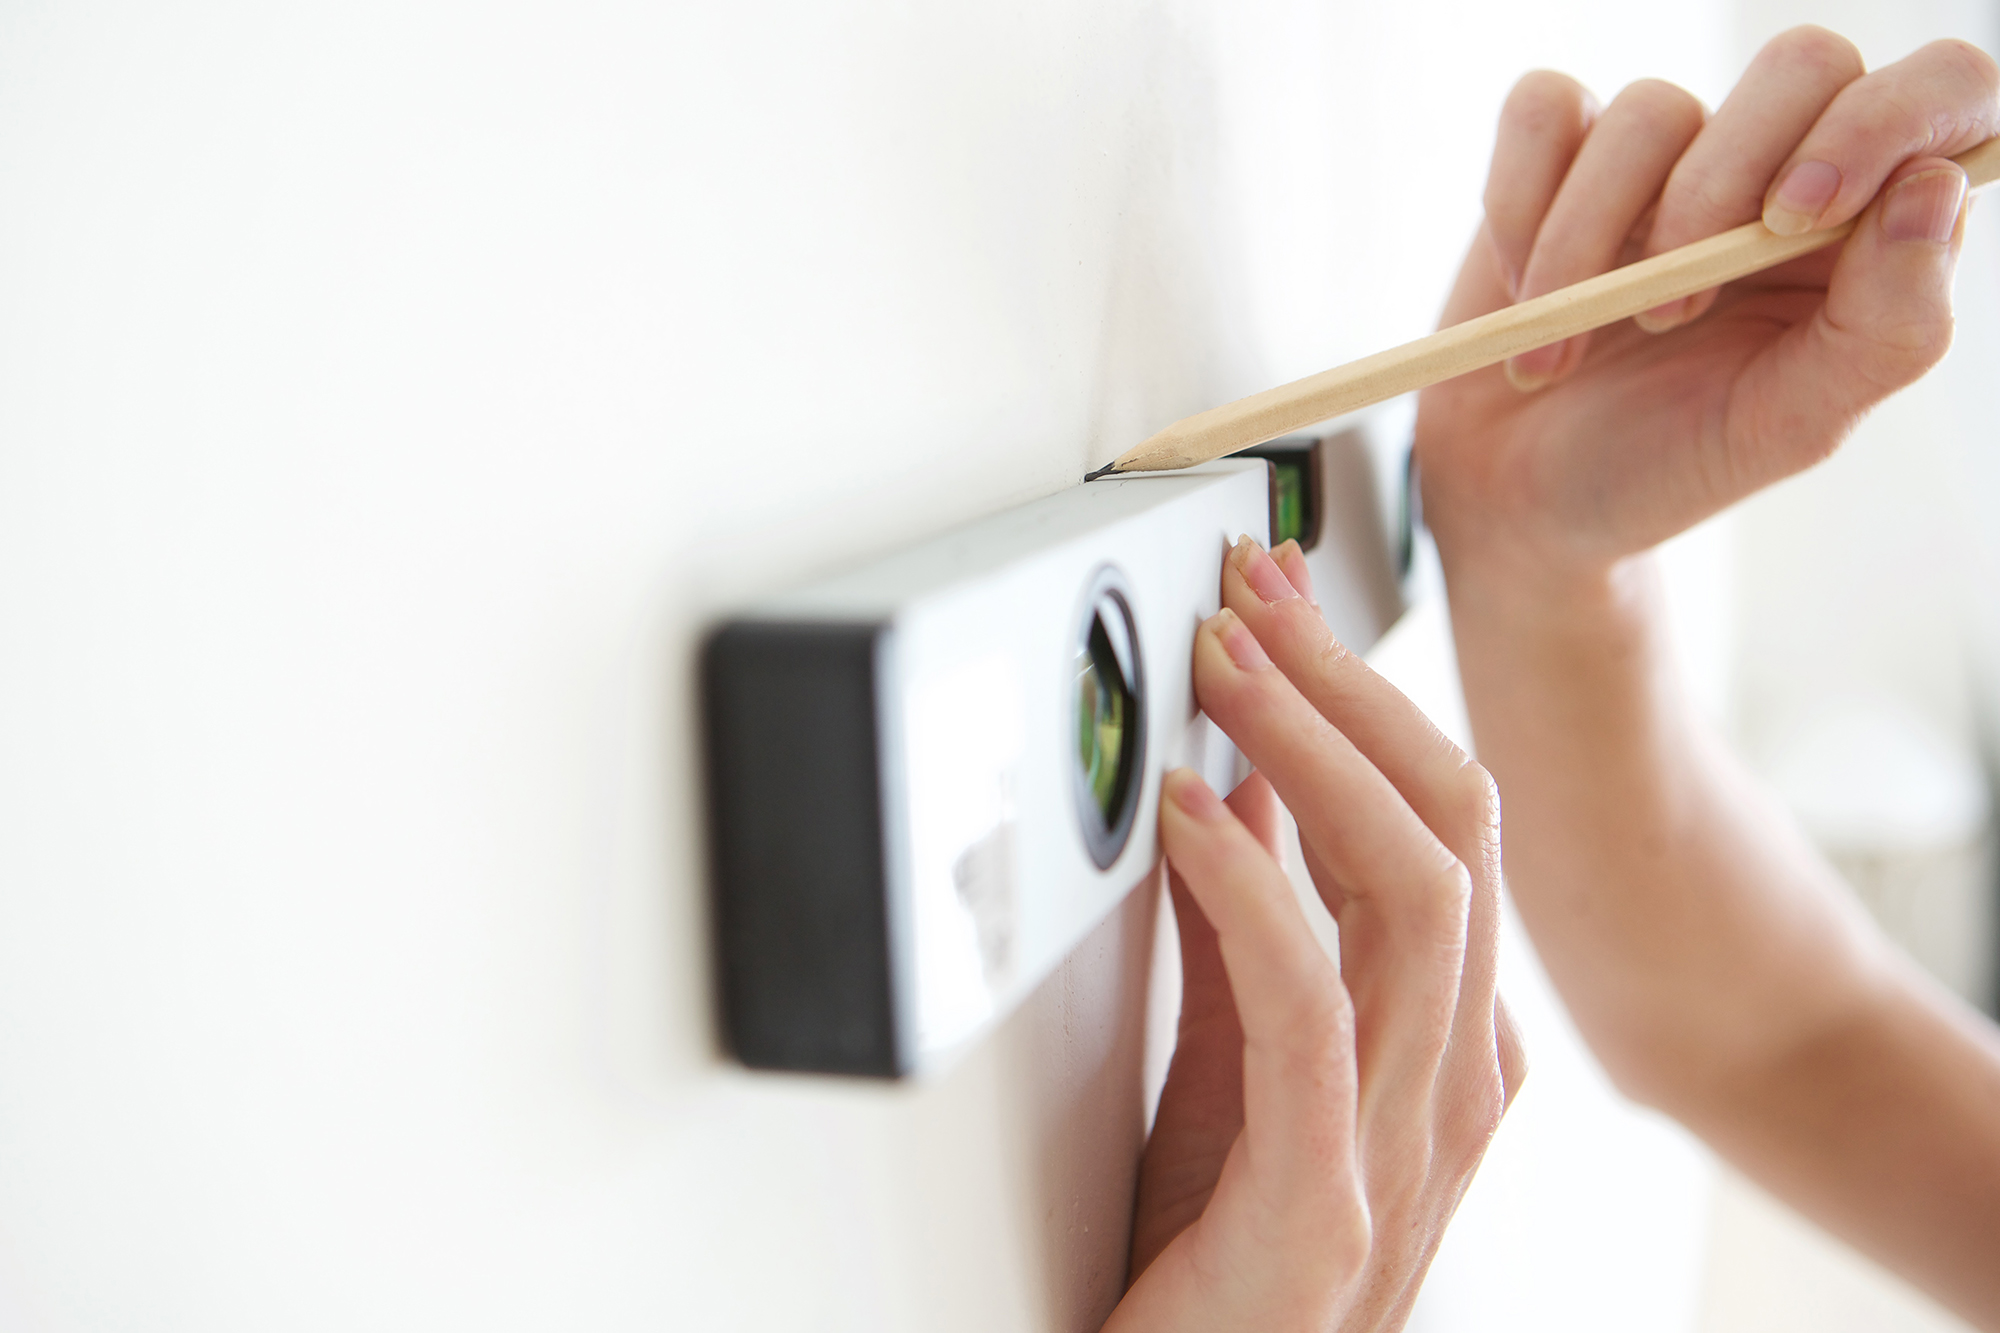
Using a spirit level and pencil, mark on your wall where you are going to place your Dado Rail and Beading Strips.
Apply a thin line of adhesive onto the back of one of the beading trims that will be placed horizontally on your wall.
Using your spirit level, attach this strip horizontally to the wall where you have marked the bottom of one of your squares. Ensure that the shorter edge faces upwards.
Attach one of your vertical strips to the wall, aligning it with a vertical line above the previously installed strip. Make sure that the shorter edge is on the inside of the rectangle.
Repeat steps 3 to 5 to complete all of your beading squares.
To attach the Dado rail to the wall, apply a thin continuous line of adhesive and press it firmly onto the marked spot on the wall. It is important to use a spirit level to ensure that it is straight.
If you notice that your beading or dado rail is coming away from the wall, it may be due to uneven walls. To fix this, apply a small amount of caulk in the gaps and use a clean, slightly wet finger to smooth it out evenly. Make sure to let the caulk dry completely afterwards.
You can now paint everything in your chosen colour. After this, you're free to tidy up and furnish your newly decorated room!
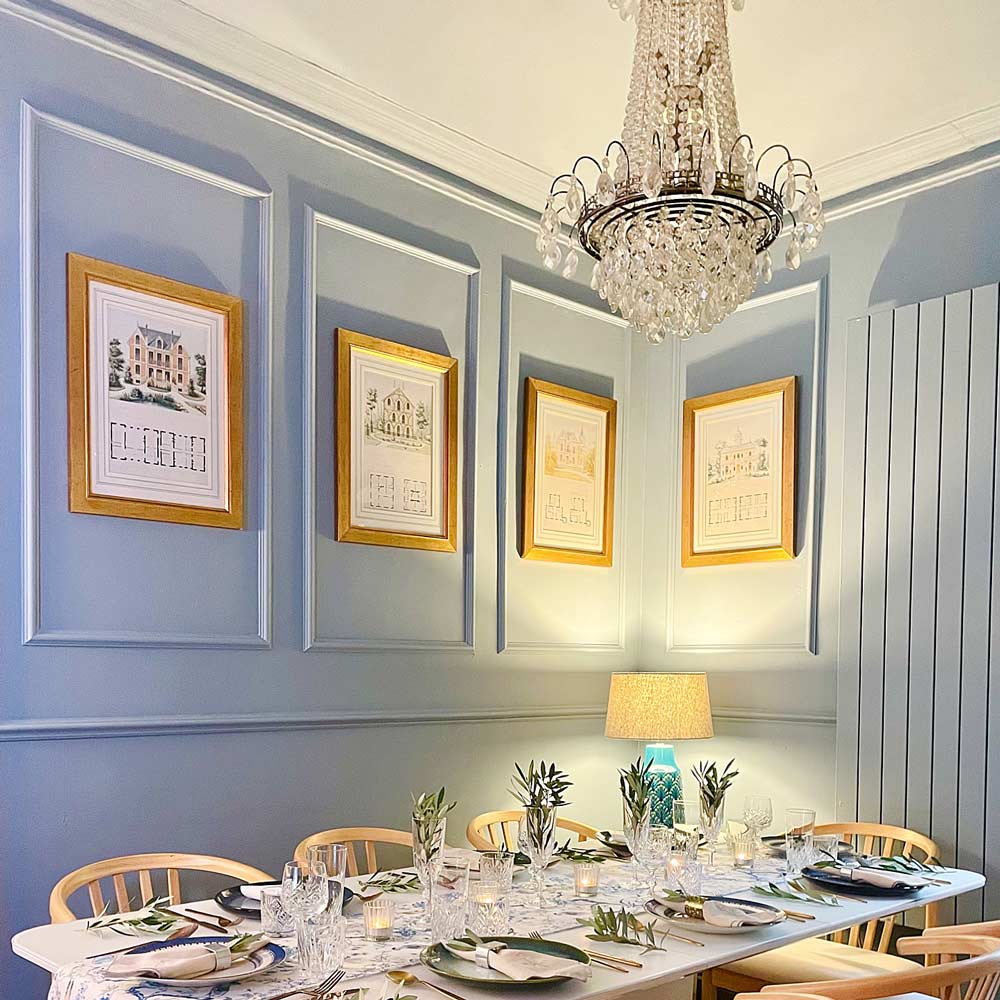
Watch as Lily at @layered.home on Instagram completely transforms her dining room in just half a day using our custom beaded wainscot panelling kit! We supplied the kit, cut precisely to her wall dimensions, making the installation process quick and easy. She then painted the panelling and walls in Grey Stone by Little Greene.
"LESS THAN HALF A DAY was all it took thanks to Cut My pre-mitred wainscoting panelling kit. Just input the size of wall to be panelled, number of rows, columns and the panel gap on the visualiser and it works it all out for you. They arrive cut to size, mitred and ready to stick and paint. No tools needed. If you're thinking of panelling and don't want the hassle of sawing, cutting, and mitreing, check them out. They offer a huge array of panelling types to suit all styles."
Wainscoting panelling gives you the option of having a two-tone colour palette. People are getting bolder with their wall colours now, but it might seem overwhelming to paint an entire wall green. With Wall Panelling at half-height on the wall, you can still apply bold colour to your room without it being too overpowering. You can even paint the beading and dado a different colour on the wall.
The dado and beading are lightweight making them easy to install.
The solid timber dado and beading take well to most adhesives and paints. As such they allow for fantastic possibilities for adding colour and creativity.
Far cheaper than large panels, dado rails and beading are cheaper materials to work with and are ideal wall panelling due to their ability to be produced and shipped cheaply and quickly for fast installation.
The solid timber dado and beading take well to most adhesives and paints, so are great for customising for different projects including bedrooms and hallways. Additionally, wood wall panelling is easy to fabricate and fix with screws, nails or glues.
Beading is a decorative trim also known as moulding. It is known to add character to any space with a simple textured mould.
Traditional beading panelling can be installed in many different rooms. It is commonly put up in hallways, living rooms and reception rooms. It is particularly popular for use in creating wainscoting panelling, which involves panelling just the lower half of the walls.
Yes! Just make sure that the adhesive is dry before you start. You could paint it the same colour as the wall, or some people paint it a different colour prior to installing it on the wall
Dado rails are decorative wooden trims that are installed horizontally along the wall. They are often used above Wall Panelling to create a classic, elegant look.
While dado rails are not strictly necessary when installing Wall Panelling, they can add an extra element of style and sophistication to your wall and the overall look of the room.
Dado rails are typically made from wood, ours are made of Pine Wood.
Installing dado rails with wall panelling typically involves cutting the rails to size, but fortunately, we do that for you! All you need to do is attach them to the wall with adhesive. You can find instructions on how to install your Wall Panelling Kit and Dado Rail here.
Yes, dado rails can be painted or stained to match the colour and finish of your wall panelling. This allows you to create a seamless look throughout the room or space. You can also choose the option for us to prime your Wall Panelling Kit and Dado so that it is ready to paint when it arrives to you.
To maintain the appearance of your dado rails and wall panelling, it's important to keep them clean and free of dust and dirt. Use a soft, damp cloth to wipe down the panels and rails regularly, and avoid using harsh chemicals or abrasive cleaning tools that could damage the wood.
Delivery depends on the size of your order