Verified
Verified
Verified
Verified
Verified
Verified
Verified
Verified
Verified
Verified
Verified
Verified
Verified
Verified
Verified
Verified
Verified
Verified
Verified
Verified
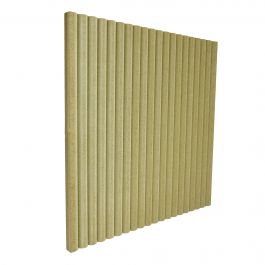
Fluted Wall Panelling
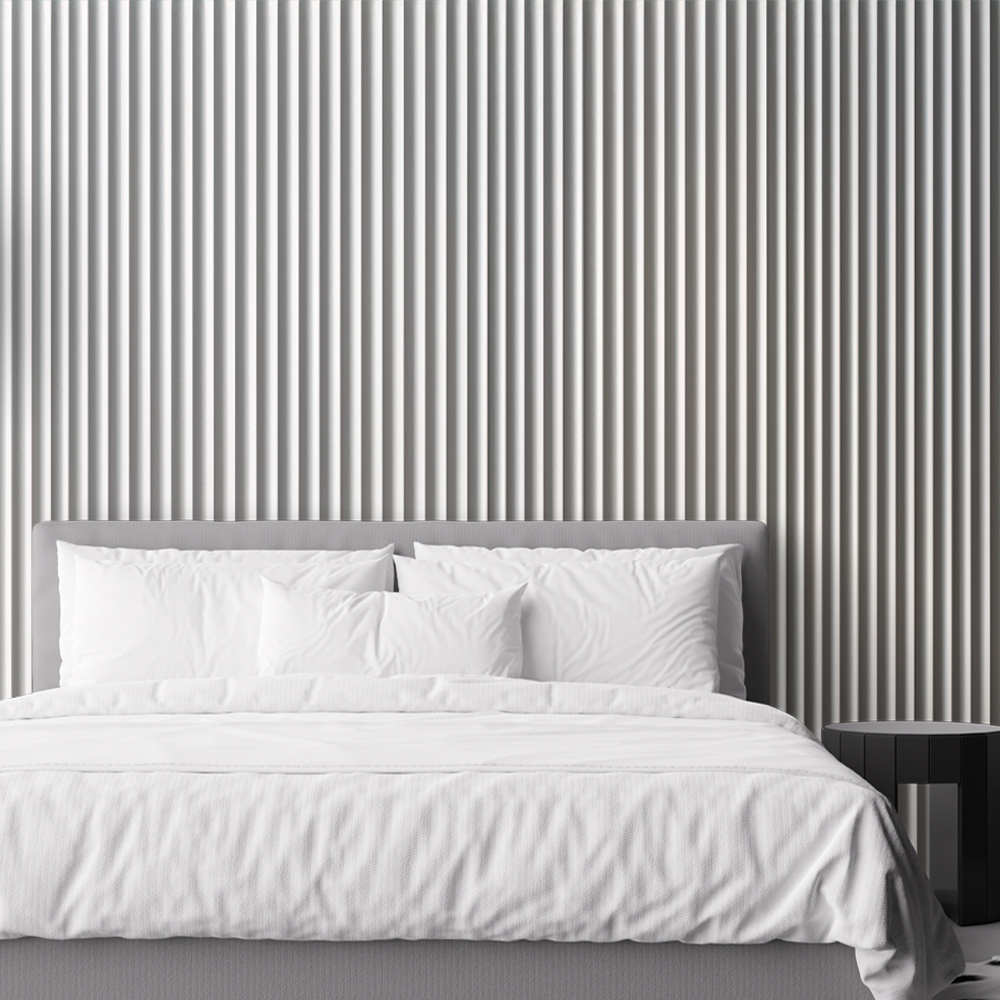
Our fluted panelling offers a versatile and customizable solution for enhancing the aesthetics of any indoor room. With its distinctive vertical grooves or channels, fluted panelling adds a touch of elegance and sophistication to various surfaces, allowing you to create a unique and visually appealing space.
Originating from ancient Greece and Rome, fluted panelling has evolved into a modern and sleek design element, incorporating elements of the Art Deco style. The evenly spaced vertical grooves create a captivating texture that adds depth and visual interest to your walls, furniture, or other interior surfaces.
One of the remarkable features of MDF panelling is its ability to interact with light. The textured surface reflects light and casts intriguing shadows, further enhancing the overall visual appeal. This interplay of light and shadow adds depth and dimension to rooms, creating an inviting and dynamic atmosphere.
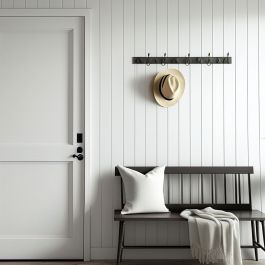
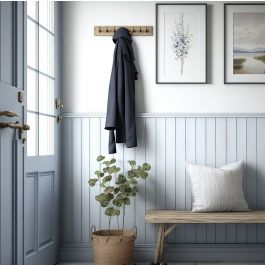
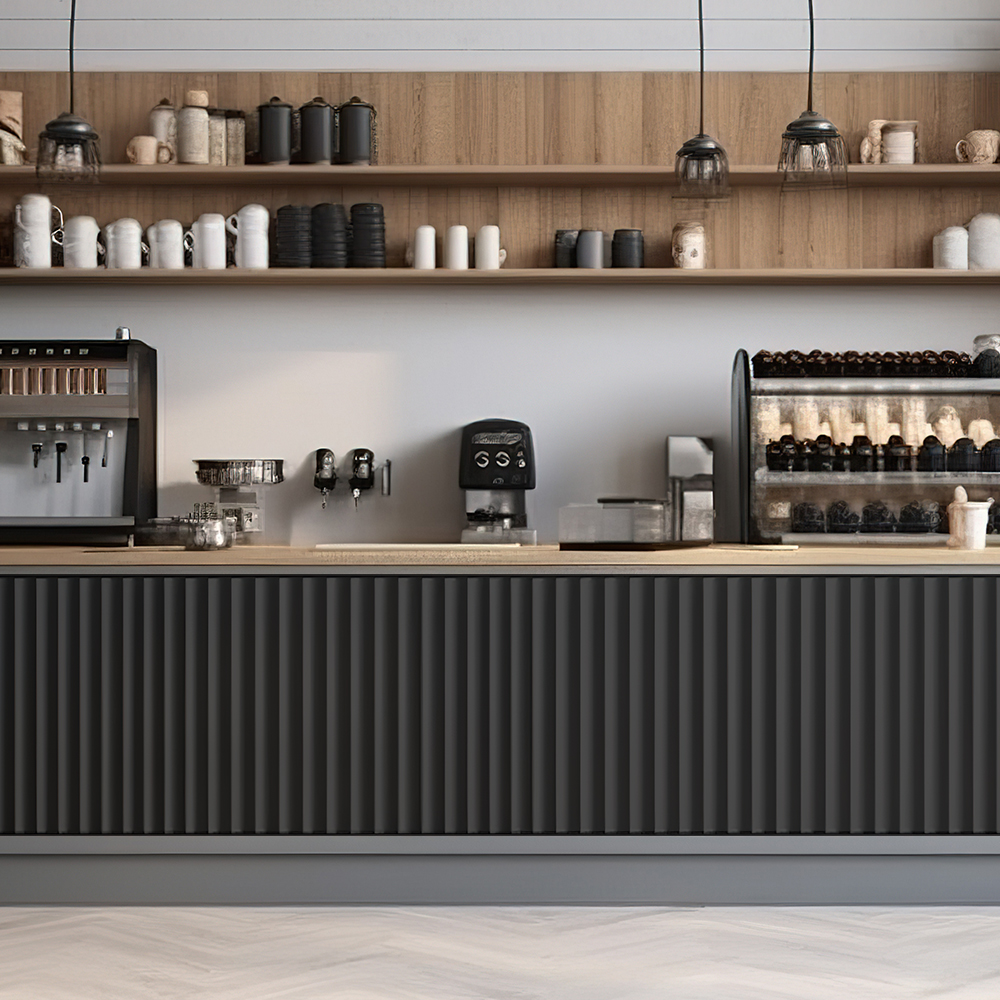
The applications of wall panelling are diverse and can inspire your creativity when designing your space. In residential settings, it is commonly used as an accent wall in bedrooms, instantly transforming the room into a focal point of style.
Additionally, fluted panelling can be employed in hallways, covering the lower half of the wall to add visual interest while protecting your walls against accidental furniture bumps.
If you would like to add a touch of sophistication to your kitchen, consider using fluted panelling on cupboards or pantry doors, bringing a unique charm to these functional spaces.
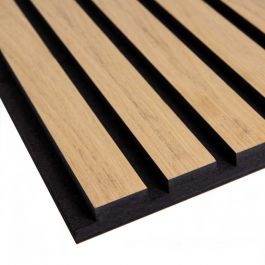
Our fluted panelling uses Moisture Resistant MDF, which is a great option if you would like to paint your panelling any colour that you wish as it absorbs paint nicely. It is also ideal for rooms such as kitchens and bathrooms which have high humidity.
What Makes Cut My Fluted Panels the Best in the UK?
Our fluted wall panelling is the best in the UK, honed through valuable customer feedback and continuous refinement.
Each panel is meticulously handcrafted in our Sussex workshop using premium, sustainable MDF with the flutes being crafted with state-of-the-art CNC machinery. We offer unmatched customisation, tailoring each panel to your precise specifications.
Unlike competitors, who leave you to cut the panels yourself, resulting in uneven edges and a mess, we take care of the hard work for you. At Cut My, we ensure superior quality and precision, saving you time and effort while delivering the exceptional results you deserve.
Where to Install Fluted Panelling
In commercial environments, such as hotels and restaurants, fluted wooden panels are widely embraced to create an atmosphere of luxury and refinement. Its distinct texture elevates the overall aesthetic and adds a sense of sophistication to these establishments, leaving a lasting impression on guests.
In the case of a kitchen island, fluted panelling can transform it into a stylish and contemporary centrepiece. By incorporating fluted panelling on the sides or front of the island, you introduce an element of texture and visual interest to an otherwise plain surface.
This design choice adds depth to the island, making it a visually captivating feature that stands out in the kitchen. The linear patterns of the fluted wood panels contribute to a modern and sleek aesthetic, perfect for those seeking a chic and sophisticated kitchen design.
The versatility of fluted panelling lies in its ability to be cut to size, allowing you to unleash your inner interior designer and explore countless possibilities. Whether you prefer a traditional or contemporary style, fluted panelling can be tailored to suit your specific needs and preferences, making it an excellent choice for those seeking a customisable design solution.
Our cut-to-size fluted panelling offers a timeless and sophisticated design element that can transform any indoor room. With its vertical grooves, it adds texture, depth, and visual interest, while its ability to interact with light creates captivating effects.
Whether you are aiming to enhance your home's ambience or elevate the atmosphere of a commercial space, fluted panelling provides a versatile and customisable solution that allows you to bring your design vision to life.
DIY IKEA Upcycle With Our Fluted Panelling
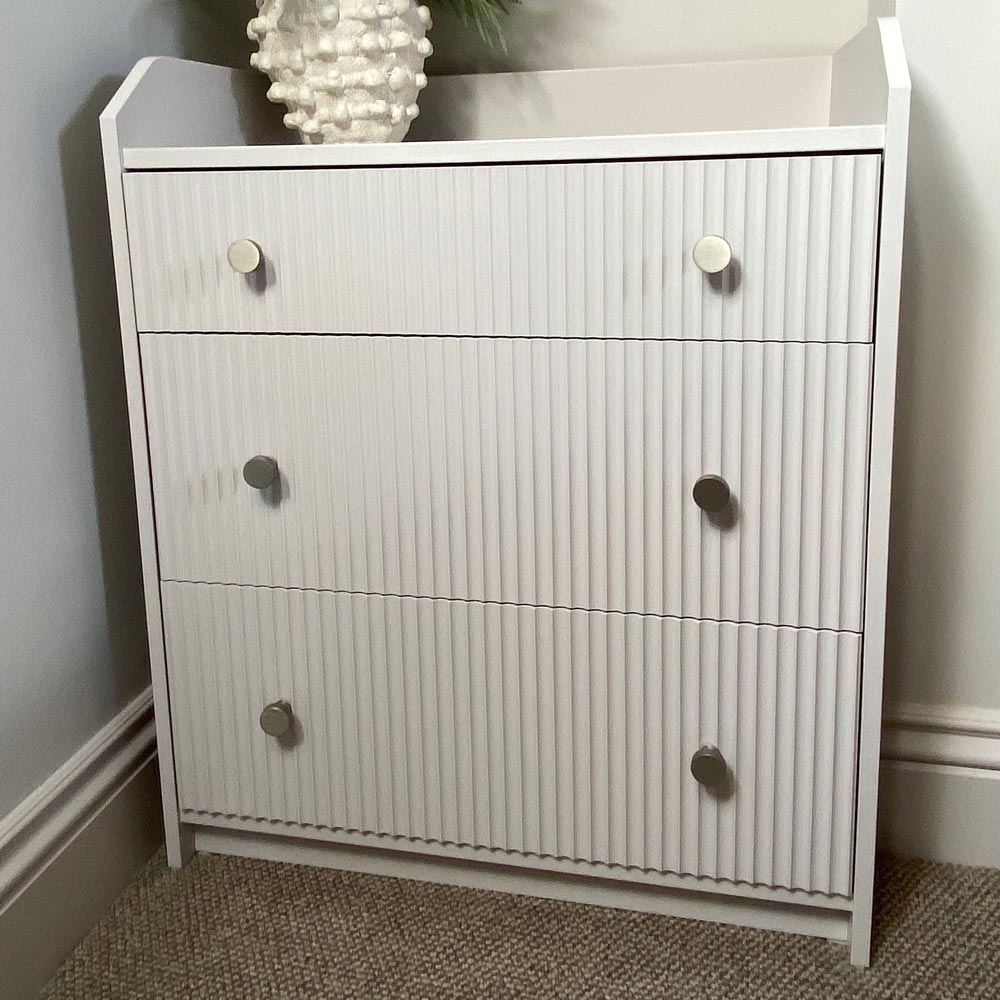
Watch Sophie (@my_eclectic_home_designs) give her IKEA bedside cabinets a stylish upgrade using our custom-cut mini-fluted panelling! She transformed the drawer fronts and added a beautiful coat of Dulux Perfect Oyster for a chic, modern look. Check out this easy DIY upcycle for some serious home inspiration!
"I attached mini fluted panelling kindly gifted from Cut My with its gorgeous scalloped grooves to the fronts of the drawers. Each panel was cut to size and to my desired specifications to ensure they aligned perfectly. I then lightly sanded, primed them with some Zinsser and applied a couple of coats of Dulux satinwood in Perfect Oyster"

Sustainably Sourced
Our Fluted and Ribbed 3D panelling is crafted from premium Medite Moisture Resistant MDF. Medite are renowned for their sustainability and environmental commitment. They ensure their raw materials come from responsibly managed forests, collaborating with the FSC and PEFC for traceability and legality.
Installing Fluted Panelling
It couldn't be simpler to install your Fluted panelling. Everything is cut to size for you so all you have to do is sand down the panels, apply adhesive to the panels and stick them to the wall. Here are some simple steps for installation, however, your order will come with a more detailed physical instruction manual to help you out!
If you have a large space to panel, you may have received multiple panels to fit together. You can lay them out on the floor to familiarise yourself with how they will be arranged on the wall.
Step 1: Prep your space
Please ensure your space has a clean, smooth, flat wall before applying your fluted wall panels. Put your Dust Sheets on the floor beneath the wall you are panelling to protect your flooring.
Step 2: Sand
Using sandpaper, sand your panelling to remove any fuzziness from the grooves of your panelling. This is especially necessary for paintable fluted panelling to ensure a smooth finish ready for painting.
Step 3: Adhere to wall
With your caulking gun, apply a snaking line of adhesive to the back of the panel and adhere it to the wall. Make sure to use a spirit level to ensure that it is straight. Then apply pressure as you push the panel board firmly to the wall.
Step 4: Repeat
Repeat steps 2 and 3 if you have multiple panels until all of your panelling is on the wall.
Step 5: Caulk
You can then use Caulk along the edges of your panels to fill any gaps. If your wall is not completely straight, you may find that your panelling seems to come away from the wall slightly, so caulk can act as a paintable filler. Use a filling knife to smooth the caulk out and wait for it all to dry.
Step 6: Prime (if necessary)
If you are using our Finsa-coloured MDF, please skip to step 8.
Using a primer and a paintbrush, prime your fluted panelling and then wait for it to dry.
Step 7: Paint (if necessary)
If you are using our Finsa-coloured MDF, please skip to step 8.
Paint your fluted panelling a colour of your choice.
Step 8: Enjoy!
Once everything is dry. You are free to clean up and enjoy your new panelling!
Specifications
| Material | Wood - MDF |
| Finish | Paintable MDF |
| Thickness | 9mm Moisture Resistant MDF |
| Maximum Sheet Size | 2400mm x 600mm |
| Minimum Sheet Size | 100mm x 50mm |
| Fire Rating | Euroclass D |
| Cutting Tolerances | +/- 1mm |
Delivery depends on the size of your order
